


Getting your new LED light bar is an exhilarating experience, but to start using it, you have to install it. So once the LED light bar is in your hands, it's time to put it to the test to ensure its functionality. In this article, we will explore the step-by-step process of installing your new LED light bar harness and guide you through the essential procedures. It is important to test the harness first before proceeding with the installation. See this blog for a more in-depth process on how to test your led light bar package. Before we begin with the step-by-step process, let’s discuss the tools and equipment required to install a LED wiring harness.

LED Light Bar Wiring Harness Installation
Before you start the installation process, you will need the following equipment and tools:
The Required Tools
- Large Flathead Screw Driver
- Socket Wrench (size varies)
- Razor
- Zip Ties
Step-by-Step Installation Process
To install the wiring harness, you will need to follow these steps:
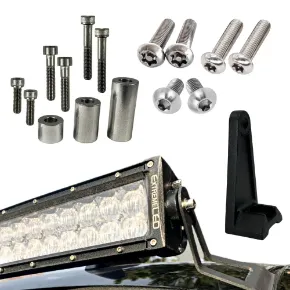
Step 1: Unpack the Wiring Harness
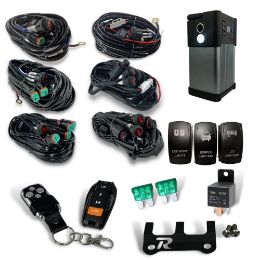
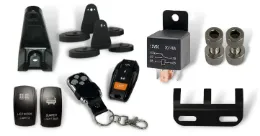
Unravel and find each part of the harness; you will have a red and black wire with ring terminals, these are the battery connections. Depending on the harness, you will have 1, 2, or 4 female connectors all coming from the relay which is a black box with a metal tap connected to it. Then once you have found all these there will be one lead left over and that will be the switch/switches which is usually a red circle or a rocker switch.
Step 2: Disconnect the switch from the harness
The next thing you want to do is run the switch to where you need it inside the car. The most common places are found on the dash near the steering wheel or it will be near or on the center console. Some off-roading vehicles will have some uncut-out spaces for rocker switches. Once you have established where to bring your switch, you will take the end of the harness and detach the switch from the rest of the harness by disconnecting the white connector. So it is smaller to fit through a smaller space.
Step 3: Run the switch wire to the right location
Locate the hole on the firewall where all your car's wires go from the engine to the car's cabin. This is usually located on the driver's side of the car. It will have a rubber gasket surrounding the hole. You will need to grab a flathead screwdriver and lift and wedge back the rubber to where you can shove the white connector. This will bring the switch’s connector underneath your steering wheel (be careful pulling the wire though so you do not cut the wire on the firewall’s sharp edge) from there you can lead it to where you need it inside your car.
Step 4: Install the rocker switch
If you are installing a rocker switch, it can be installed to either a pre-cut-out slot in your car or you can measure and cut out a rectangle where your switch will slide into. Once that's determined, plug the switch back into the harness where the wire will go through the hole where you want your switch to be. If you have a dual color bar with two switches and only have one cut-out slot? There is an option for that as well. it's called an X6/X6S Dual push rocker switch.
Step 5: Zip-tie the wires
As you backtrack from the switch pull tight on the wire and zip tie as you make it back into the engine bay. (if you get a wireless remote this is when you will connect the box between the wiring harness and switches) wireless remotes are available here.
Step 6: Connect the led light to the harness
Bring the female connector from the harness to where your pods or bar’s male connector is. If you need more wire, you want to do this after the switches. (If the harness is not long enough there is no problem, with multiple wiring extensions that you can find here).
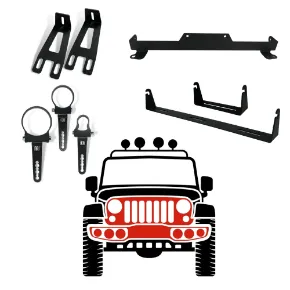
- Hood/Windshield - One of the most common places to wire is through the very top of your hood by the windshield. If it is the pods that you are running the wire to, it will be right there and all you will need to do is plug them together and zip tie them down and make sure they will not shift around. Also, keep in mind that the hood could pinch the wires when closed so pick a spot with a gap. If you are running the wire up to the top of the windshield you can use the rubber gasket on the side of the windshield to hold the wire in place then make sure to add zip ties where you can to secure the wire more.
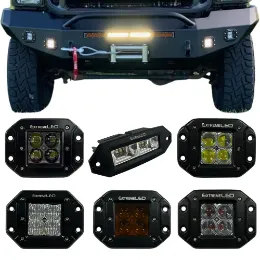
- Bumper/fog/knuckle lights - there are a lot of optional routes to take your wire through to get to these places. The key thing to look out for is hot and or moving parts. If you manage to avoid these you will be ok to zip tie down the wire and secure it to most places. The easiest way is to usually follow other wires if it's going in the direction you need then you will be able to just zip tie the wires to your car's wiring this will make sure it won't get in the way of anything.
Step 7: Connecting the harness to the battery
Next, connect the harness to the car’s battery. The first step is to loosen the battery’s car connections which are usually held on by a nut and screw. When loosening the battery connections, it's essential you do not touch both sides of the battery. These are called the positive (RED) and negative (BLACK). Connect the positive connection first then the negative. Each battery will be different per car so use your best judgment on where and how to connect the wire to the battery.
Step 8: Install the Relay Holder
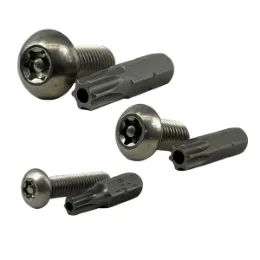
When you have everything connected, you can install your relay holder depending on the car you may or may not have pre-existing holes to screw your relay into. If you do not use the same directions as installing your led light bracket and secure it down with the rivet screws it comes with. Once installed, remove the metal tab from the relay and slide it onto the relay holder when finished. This will keep your engine bay clean and safe.
Step 9: Testing the led light bar/pods
Lastly, all you need to do is see if it works! Just flip the red switch or rocker switch and light up the night.
![]()
Meet the Author: Extreme LED has been helping offroad enthusiasts with their LED lighting needs since 2011. We have built our company to provide you with the best experience from shopping to customer support and ultimately use and longevity of our products. Our high-performance LED Light Bars & Pods are covered by our Lifetime Warranty and with free shipping over $100, you can rest assured that you are getting a high-quality product that will provide long-lasting lighting for your vehicle.